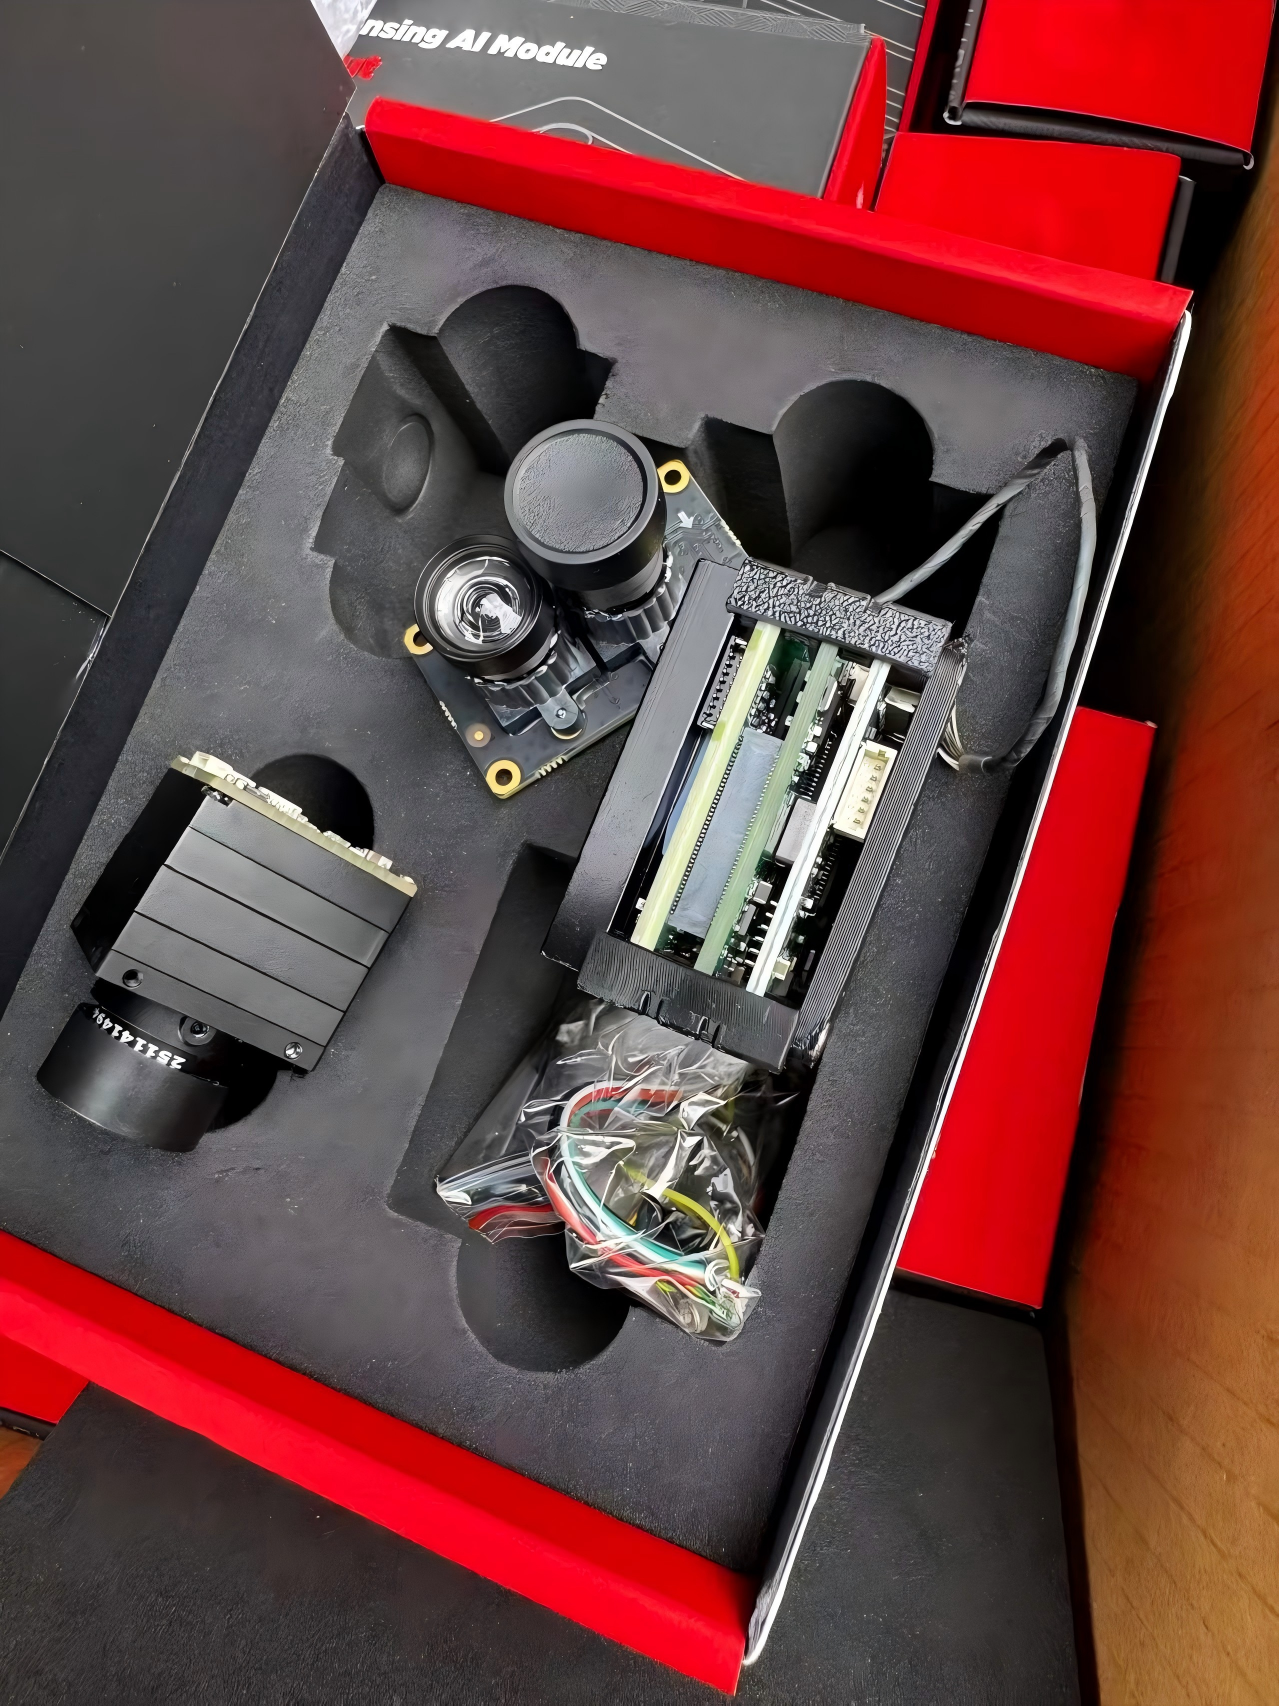
An AI vision development kit for drones is the bridge between a vendor's spec sheet and an OEM team's airframe. What ships in the box, how it is packaged, and how cleanly it integrates tells you more about a supplier than any datasheet. This guide breaks down what a complete kit should contain, how to evaluate it in 6 steps, what packaging signals about supplier maturity, and how the move from sample to production typically plays out. Examples reference AERVUE AI VisionCube kits where relevant.
1. What an AI Vision Development Kit Actually Is
Most OEM platform builders use the phrase loosely. In a precise sense, an AI vision development kit for drones is a complete, ready-to-bench evaluation sample of an onboard AI vision module — packaged so an integrator can take it from box to first detection within an afternoon, without sourcing missing parts.
The kit is not the same as a production-grade module. A production module is one airworthy unit, often shipped in bulk anti-static trays without manuals or test cables. A development kit, by contrast, is a self-contained evaluation package: the module plus everything needed to power it on a bench, capture its output, and verify its claimed performance before any platform integration starts.
The distinction matters because the kit is where buyer trust is built or lost. A spec sheet promises 1.2 km vehicle detection; the kit is what lets the buyer prove it on their bench, with their software stack, against their test footage. If the kit is incomplete — missing a cable, wrong voltage, no documentation — the spec sheet becomes harder to believe.
2. Why Development Kits Matter for OEM Drone Teams
For a drone OEM evaluating a new vision supplier, three risks dominate the sample stage:
- Integration risk. The module spec looks right, but does it actually plug into the existing flight controller, autopilot, and ground station without firmware surgery?
- Performance risk. Does the claimed detection range and frame rate hold up under the team's real conditions — not the vendor's marketing footage?
- Supplier risk. Will the supplier deliver consistently at 100, 500, 1,000 units, or will the production batch arrive looking nothing like the sample?
A well-built drone AI evaluation kit reduces all three. Integration risk drops when the kit ships with correct connectors, voltage matched to common airframes, and integration documentation that names actual flight controller models. Performance risk drops when the kit includes a USB capture cable so the team can bench-test before any flight time. Supplier risk drops when the kit looks like it came off a production line, not from a shelf in a back room.
3. What Should Be Inside the Box
Different vendors include different things, but a fully equipped AI vision development kit for drones — at the configuration most OEM teams need — contains a consistent core set of items. The image below shows a representative example: the AI module main board, the sensor pair (visible plus thermal, in this configuration), the interconnect cables, mounting hardware, and the power lead.
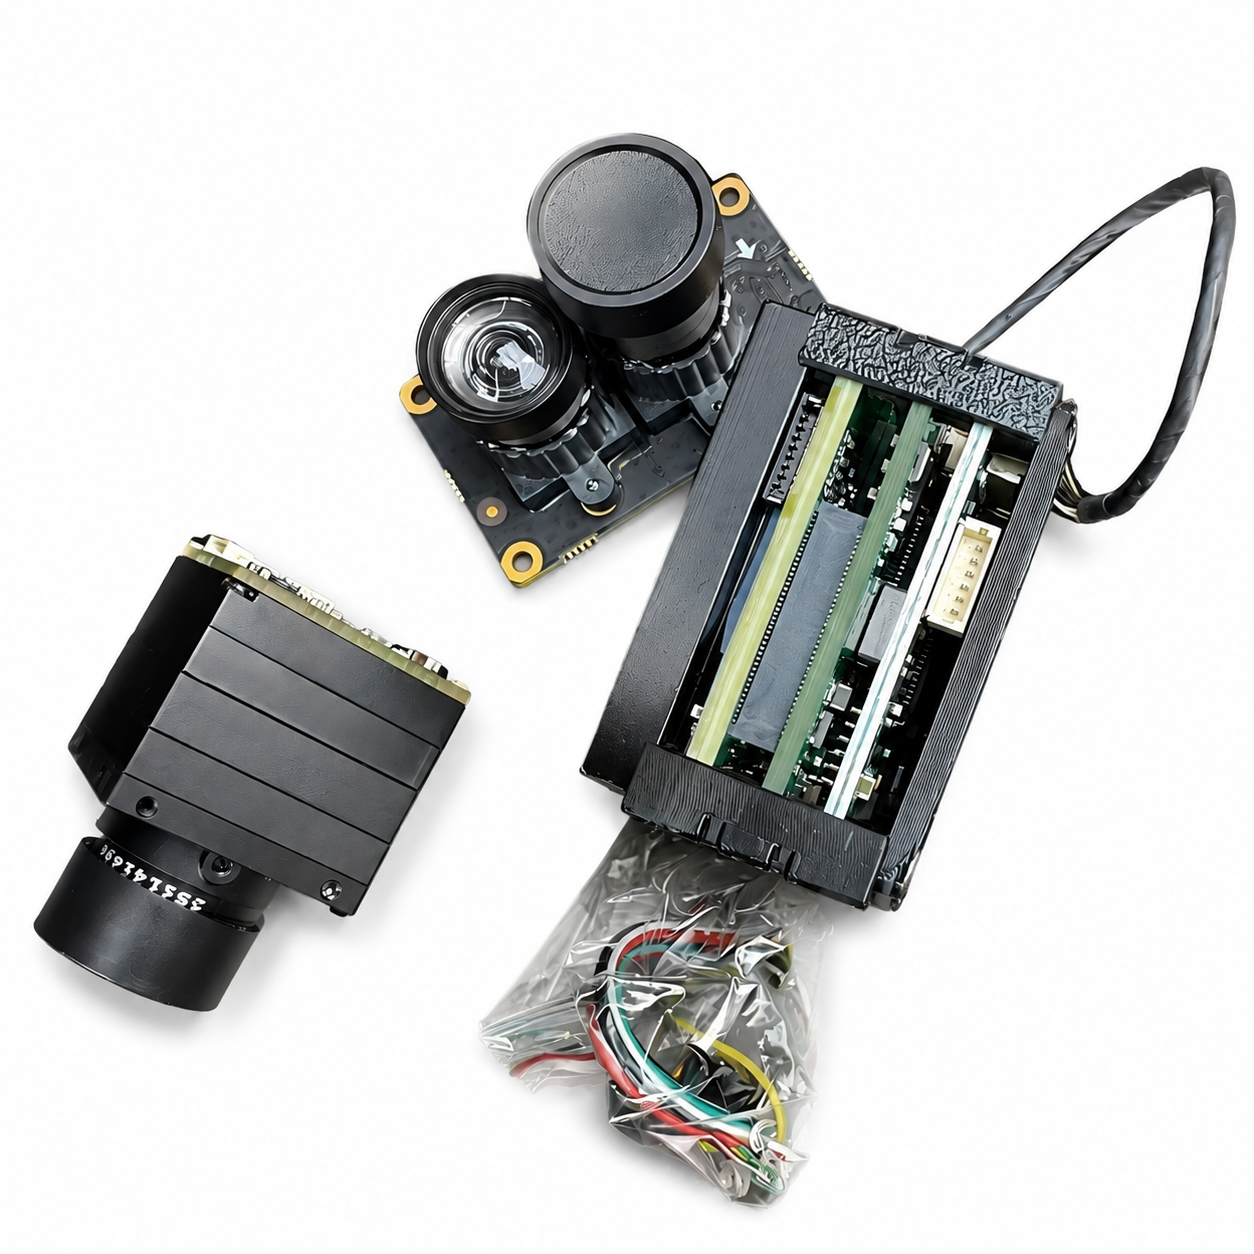
The checklist of what a proper kit should contain:
- Main AI board. The NPU module with the pre-trained YOLO model already flashed.
- Sensor pair (or single). The CMOS visible sensor at the spec'd focal length, plus the thermal core if the configuration calls for one. Lenses pre-installed and protected.
- Interconnect cables. All sensor-to-board cables in correct lengths, with locking connectors. Spares appreciated.
- Power lead. Matched to the target airframe voltage (typically 9–16 V for commercial UAVs). XT30 or XT60 connector pre-fitted.
- USB-out bench cable. Lets the team capture frames on a laptop before integrating with the flight stack.
- Mounting bracket. Sized to the standard mount of the module (e.g. 25.5 mm for AVC-class modules), with bolts in M2 or M3.
- Quick-start guide. Printed, 4–8 pages, covering power-on sequence, default IP/baud, output protocol, and how to capture a first detection.
- Serial number and warranty card. Tracked unit, not anonymous.
The absence of any of these is a yellow flag. The absence of two or more — particularly the USB capture cable and the quick-start guide — is a sign that the kit was assembled informally rather than as a productized SKU.
4. Sensor Configuration Choices at the Kit Stage
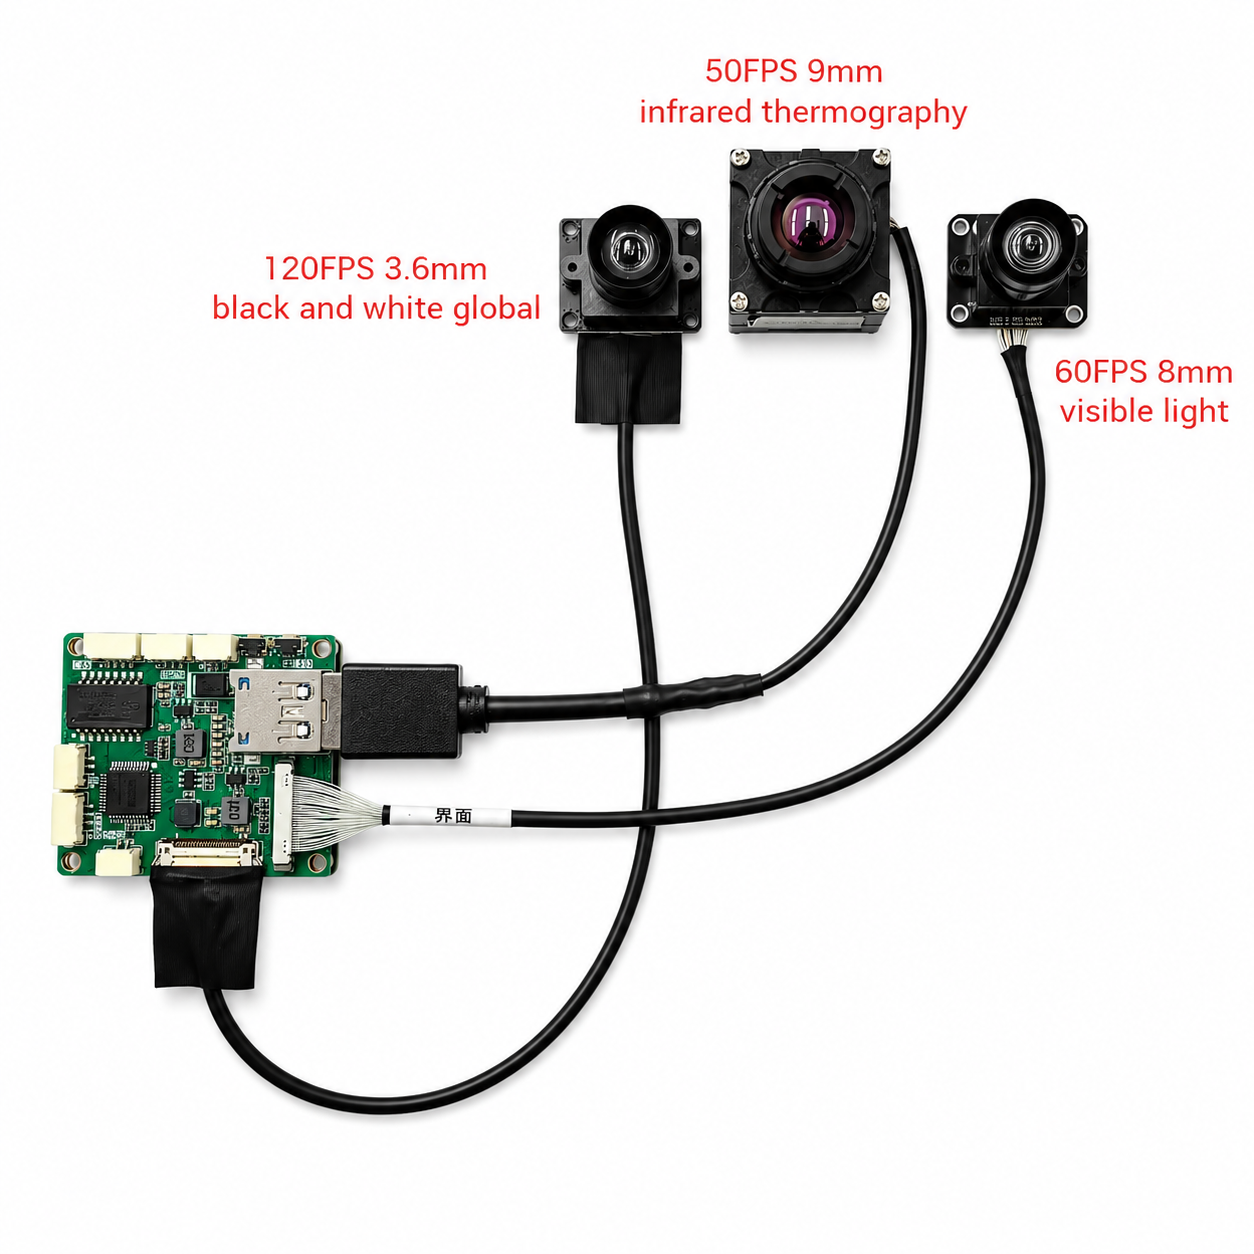
Most AI vision module families come in several sensor configurations: mono visible, dual visible (wide plus telephoto), or visible-plus-thermal. The kit configuration should match the production configuration the OEM is targeting — evaluating a mono kit and then assuming the dual variant performs the same is a common mistake.
A practical configuration matrix at the kit stage:
| Configuration | Typical kit use | What the kit must include |
|---|---|---|
| Mono visible | Daytime entry-tier evaluation | Board, single CMOS, one cable, power lead, bench USB |
| Dual visible | Long-range daytime / multi-target | Board, wide + telephoto CMOS, two sensor cables, power, bench USB |
| Visible + thermal | 24-hour, SAR, perimeter | Board, visible CMOS, thermal core with lens protection, fused-pipeline cable set, power, bench USB |
| Triple sensor | Long-range day/night ISR-class | Board, dual visible + thermal, three sensor cables, dual-feed power, bench USB |
If the platform is still undecided on configuration, two parallel kits (e.g. mono visible plus visible-plus-thermal) is often cheaper than a single all-in kit, because each is optimized for clean bench testing of its own pipeline. For a deeper breakdown of how configuration maps to use case, see our companion guide on AI VisionCube model comparison.
5. Why Packaging Is a Supplier Quality Signal
Engineers reading this might bristle at "packaging" being a serious topic. It is. In B2B hardware procurement, packaging is the cheapest, most reliable proxy for whether a supplier has a real quality system or improvises every order.
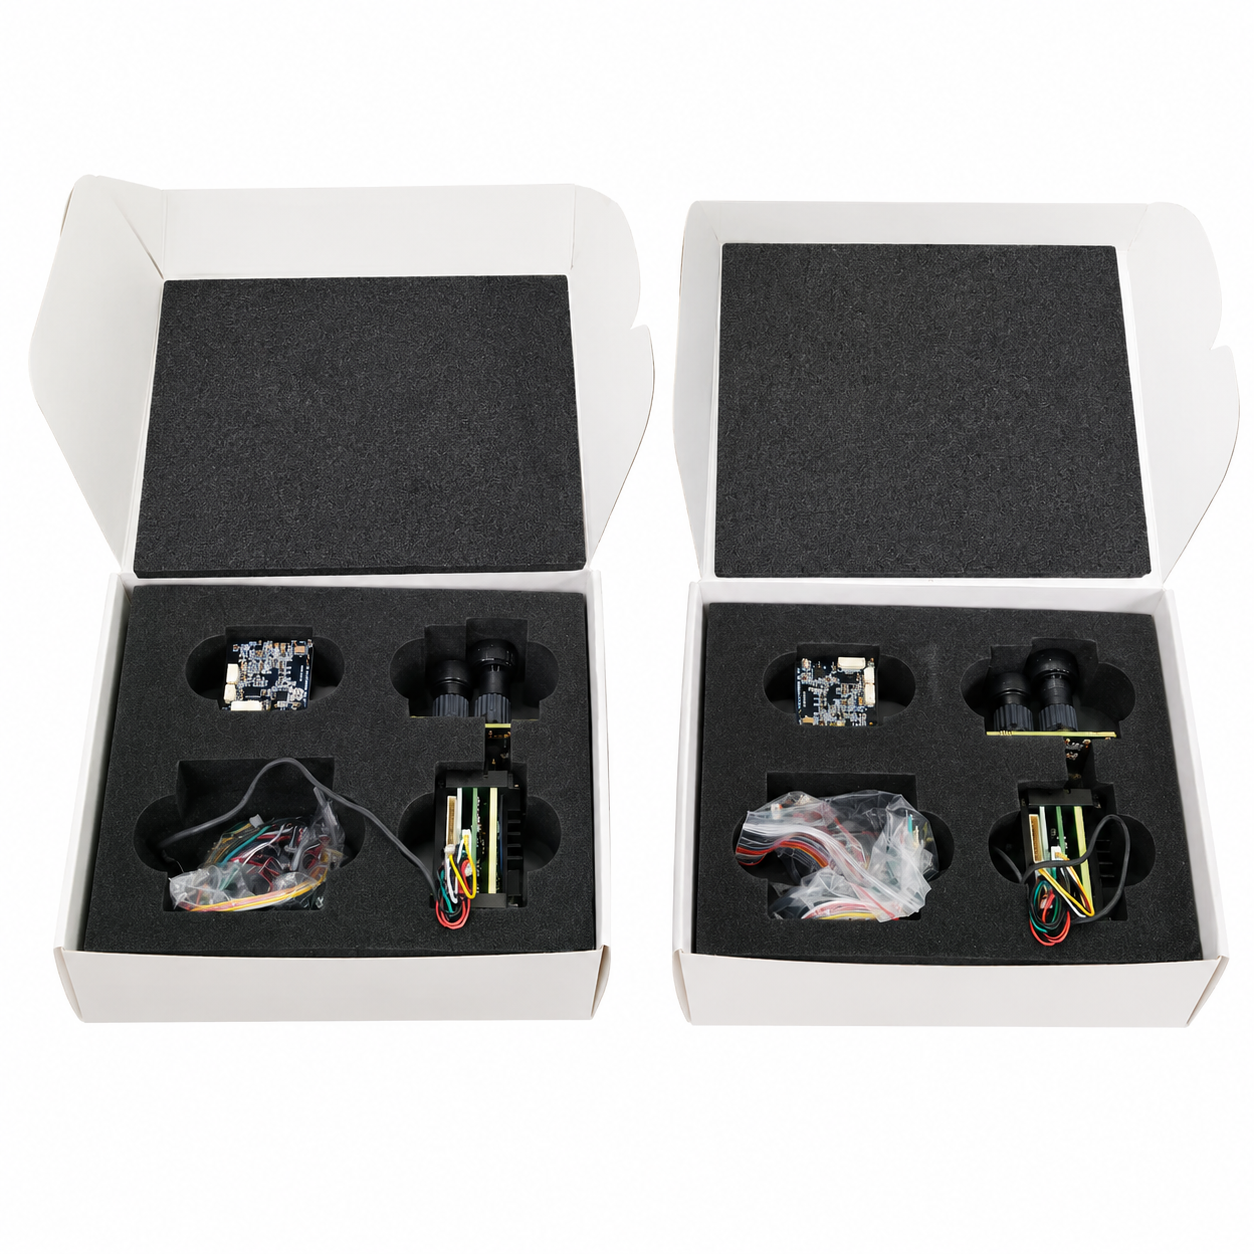
Three packaging tells separate a productized sample from a hand-assembled one:
- Foam-cut compartments. Each component sits in a die-cut foam slot rather than rattling loose. This is the difference between a kit that survives the freight handler and one that arrives with bent connectors.
- Anti-static handling. Boards in pink anti-static bags, cameras in lens-protected sleeves. A supplier that ignores ESD will eventually ship a unit damaged in transit and not know.
- Sealed and serial-numbered outer box. A traceable shipment with a barcode and a packing slip that matches the bill of materials. This is what a real OEM expects, and it is also what makes warranty handling possible when something goes wrong later.
None of these add meaningful cost — EVA foam and ESD bags are cents per unit at volume. What they require is process: someone in the factory whose job is to make sure every sample ships the same way. If a supplier has that, it usually has the rest. If a supplier ships loose in a padded envelope, treat the spec sheet with proportional skepticism.
6. The 6-Step AI Vision Development Kit for Drones Evaluation
Once a kit arrives, a disciplined OEM team typically runs through a 6-step evaluation before deciding whether to advance to production tier:
For most OEM teams this runs 2 to 6 weeks end to end. Bench work (steps 1–5) takes 5 to 10 days. Airframe testing (step 6) takes the rest — it is the gating step because it stresses the module against the actual operating envelope.
7. Common Pitfalls During Evaluation
Three pitfalls catch OEM teams repeatedly:
Testing the wrong configuration. Evaluating a mono visible kit and assuming the dual variant has the same characteristics. Frame rate and detection range scale meaningfully with sensor count and TOPS; bench results from a different SKU are not transferable.
Skipping the cold start. Power-cycling matters. A module that works after running for 20 minutes but takes 90 seconds to boot from cold is unacceptable in field deployment. Always test cold start time as part of bench evaluation.
Evaluating against vendor footage instead of your own. Vendor demo footage is curated. Your real operating environment has different lighting, target distances, backgrounds, and weather. Capture your own test set early — it is the only data that predicts production performance.
A useful rule: the kit evaluation budget should match production risk. A 100-unit production commitment justifies 4 weeks of evaluation. A 1,000-unit commitment justifies a few months and two suppliers in parallel.
8. Integration Documentation Worth Checking
What ships in the printed quick-start is rarely the full integration story. Before committing to production, an OEM team should obtain (or confirm availability of) the deeper documentation set:
- Electrical interface document. Pinouts, voltages, current draw under load, ESD ratings.
- Output protocol spec. Message format, telemetry rate, target ID structure — CRSF or MAVLink message definitions.
- Mechanical drawing. Dimensioned 2D drawing plus a STEP file for the CAD team.
- Firmware update procedure. How to OTA-update the deployed module post-shipment, and what is required at the airframe end.
- Custom training option document. If custom detection classes are planned (see our guide on custom AI detection models for drones), the MOQ, dataset requirements, and lead time.
A supplier that can produce all five within a week of request is operating at a real OEM grade. A supplier that takes a month, or never produces the mechanical drawing, will struggle to support a platform at scale.
9. Moving from Sample to Production
Once evaluation passes, the move from sample to production is a contract conversation, not a technical one. The AI vision development kit for drones itself does not change form factor; the production unit is the same module that shipped in the sample, minus the bench cables and packaging. Output protocols at this point are usually locked — most commonly MAVLink for ArduPilot/PX4 platforms or CRSF for compact integrations.
Typical tier structure:
| Tier | Volume | Lead time | Notes |
|---|---|---|---|
| Sample | 1–2 units | 1–3 days | Evaluation kit. Sometimes free for qualified OEM accounts. |
| Starter | 10–50 units | 1–2 weeks | First production batch. No deep customization yet. |
| Production | 100–300 units | 2–4 weeks | Standard OEM tier. Where most platforms operate. |
| Volume | 500–999 units | 4–6 weeks | Volume pricing kicks in. Custom housing or branding possible. |
| Bulk | 1,000+ units | By quotation | For established platform builders. Custom firmware, detection classes, OTA pipeline negotiated. |
At the production tier, the sample becomes the reference unit — every shipment should match it bit-for-bit. The serial number on the evaluation unit is not just a tracking artifact; it is the unit the team has validated against, and it sets the bar for every unit that follows. A supplier that ships production units that drift from the evaluated sample is a supplier you cannot scale with.
For OEM platform builders working through the wider integration picture, the companion guides on edge AI for drones and choosing a drone AI tracking module cover the architecture and module-selection decisions that sit alongside the kit evaluation.
10. Frequently Asked Questions
An AI vision development kit for drones is a packaged evaluation sample containing a complete onboard AI vision module — main board, paired sensors (visible and optionally thermal), interconnect cables, mounting hardware, and documentation — so an OEM platform team can integrate and bench-test the module before committing to volume production. A proper kit also includes anti-static handling, foam-cut packaging, and a clear bill of materials.
At minimum: the main AI board, camera modules in the target configuration (mono visible, dual visible, or visible-plus-thermal), all interconnect cables in correct lengths, power leads matched to airframe voltage, a mounting bracket, a printed quick-start guide, and a USB-out cable for bench testing. Anti-static bagging, foam-cut packaging, and a serial number for warranty tracking are signs of a properly run supplier.
From sample receipt to a go/no-go production decision, an OEM evaluation usually runs 2 to 6 weeks. Bench integration and protocol verification take a few days; airborne testing across the operating envelope, target classes, and edge conditions takes the bulk of the time. Faster timelines are possible when integration is well documented and the team has done similar evaluations before.
Packaging is the first reliability signal an OEM buyer sees. A kit that arrives in a sealed box with foam-cut compartments, anti-static bags, and protected camera lenses tells the buyer the supplier ships consistently. A kit that arrives loose in a generic envelope tells the buyer that quality control is informal — which becomes a real risk at production volume.
MOQ varies by tier. Sample quantities are typically 1 to 2 units, sometimes free for qualified OEM accounts. Starter tier (initial production) usually runs 10 to 50 units. Production tier kicks in at 100 units and is where most OEM platforms operate. Volume pricing applies at 500+ units, with bulk tiers above 1,000 for established platform builders.
Limited customization is normal at the sample stage — sensor configuration choice (mono vs dual vs thermal-paired), cable length, output protocol selection (CRSF vs MAVLink), and mount style. Deeper customization such as custom housing, branded OSD, or custom detection classes typically requires a production-level commitment of 100 units or more before the factory will invest the engineering time.
Conclusion: The Kit Is the Audit
For an OEM platform team, the development kit is the cheapest, fastest way to audit a supplier before committing to volume. The module's spec sheet is one signal; the sample is a much richer one. What ships, how it ships, what is missing, and how cleanly it integrates says everything about whether the supplier will hold up at 100, 500, or 1,000 units.
The framework is straightforward: a complete AI vision development kit for drones, evaluated against your own footage, on your own airframe, with full integration documentation in hand before any production commitment. If the supplier passes that audit, the production phase is usually low-drama. If the supplier fails it, no amount of unit-price negotiation will fix what comes later.
If you are scoping an AI vision module for a commercial drone platform and want to know what a proper evaluation kit looks like before requesting a sample, our team can match a configuration to your platform, walk you through the integration path, and ship within 1 to 3 days. The kit pictured throughout this guide is the AERVUE AI VisionCube evaluation configuration — one example of what an OEM-grade dev kit looks like in practice.
Need an AI vision development kit for your drone platform?
Tell us your airframe, mission profile, and sensor configuration. We will recommend the right kit, walk through the integration path, and ship a sample within 1–3 days — with factory-direct pricing from sample to volume.